Hotwiring FastAPI

FastAPI is my goto tool for small Python projects, but what about the UI? I don't want to go to the trouble of setting up a full-blown front-end framework as I work out a proof of concept, but I still want Tailwind and TypeScript at my disposal as I put together the prototype.
My solution? Hotwire
For years the trend in web development has been towards more frontend rendering and state management. We are starting to see some attitude shifts which have arisen from the pitfalls of taking this approach too far. Hotwire (HTML Over the Wire) takes a different approach. I like to think of it as a portable version of Phoenix LiveView. It creates pockets of interactivity on the page fueled by HTML served from the backend with javascript sprinkled in just for what's needed on the client side. It's a toolkit comprised of three JS libraries.
-
Turbo does the heavy lifting. It automatically captures links and form submissions and routes them through fetch calls instead. The server returns the updated HTML for the relevant portion of the page.
-
Stimulus is a minimalist framework for any gaps that javascript needs to fill in. It's not necessary to use with Turbo. You could just as easily use something like Alpine.js in it's place.
-
Strada aims at bridging together web and native mobile components to maximize your code reuse across environments. I will not be covering Strada in this article.
This article will just go into a basic setup that you can use as a baseline for your own project. Then we'll build a simple todo app to showcase how the integration of these technologies can be used. The full git repo is available here
Backend Structure
For this project the TypeScript and Python configuration files will live together at the root of the project. The source code will go into separate backend and frontend folders. I'll be using Poetry for the Python dependency management, which is fitting, because my Python code often looks like it was written by E.E. Cummings.
You'll need to install Poetry on your system. Instructions are available here.
Once you have Poetry installed run poetry init from your project directory.
When it asks which dependencies to include add the latest versions of fastapi, uvicorn, pydantic, python-multipart, and jinja2.
When you're done with the initialization process, you should end up with a pyproject.toml file like below.
# pyproject.toml

[tool.poetry]
name = "hotapi"
version = "0.1.0"
description = "A fullstack micro-framework using FastAPI and Hotwire"
authors = ["Shane Scanlon <shane@turtlestack.dev>"]
license = "MIT"
readme = "README.md"

[tool.poetry.dependencies]
python = "^3.11"
fastapi = "^0.105.0"
uvicorn = "^0.24.0"
pydantic = "^2.5.2"
Jinja2 = "^3.1.2"

[build-system]
requires = ["poetry-core"]
build-backend = "poetry.core.masonry.api"
The [tool.poetry] section defines the project metadata.
Let's add a package declaration to that block underneath the readme line, so poetry knows where our source code lives.
packages = [{include = "hotapi", from = "backend/src" }]`
This tells Poetry that we have a Python package named hotapi that resides in the backend/src directory.
We will use a standard src layout, only nested within a top-level backend folder.
The [tool.poetry.dependencies] section adds Python 3.11 as a dependency,
as well as the FastAPI package, uvicorn for serving the api, pydantic for models, python-multipart for form handling, and Jinja2 for templating.
Run poetry install to pull down the dependencies into a virtual environment and create the poetry.lock file.
Here is the project structure we will begin with.
├── backend
│   ├── src
│   │   └── hotapi
│   │       ├── __init__.py
│   │       ├── main.py
│   │       ├── models
│   │       │   ├── __init__.py
│   │       │   └── models.py
│   │       └── routers
│   │           ├── pages.py
│   │           └── __init__.py
│   └── tests
├── poetry.lock
├── pyproject.toml
├── README.md
├── static
└── templates
The program entrypoint is main.py. This is where the FastAPI app will be configured and initialized.
The models package is where we add Pydantic models for the API later in this post.
For now we will focus on the routers package, which is where we will define our routes.
Here we create a pages.py file to serve all our frontend routes.
We will keep the API simple for this post, so we will keep all those routes together.
The static folder is where our asset files will live. The templates folder will contain our Jinja files.
Routing
Create the files shown above and open up main.py and then the following.
# backend/src/hotapi/main.py

from fastapi import FastAPI
from fastapi.staticfiles import StaticFiles

# we will define this router in a moment
from hotapi.routers import pages

# initialize FastAPI
app = FastAPI()
# mount the static assets folder
app.mount("/static", StaticFiles(directory="static"), name="static")
# include our router
app.include_router(pages.router)
Now we configure the frontend router to use Jinja templates and return HTML.
Open up pages.py and add the following.
# backend/src/hotapi/routers/pages.py

from fastapi import APIRouter, Request
from fastapi.responses import HTMLResponse
from fastapi.templating import Jinja2Templates

# initialize the frontend router
router = APIRouter()

# configure the template engine
_templates = Jinja2Templates(directory="templates")


# define the home page route
@router.get("/", response_class=HTMLResponse)
async def home(request: Request):
    # render the template file in /templates/home.html
    # we are not currently using this request object
    return _templates.TemplateResponse(
        "pages/home.html.j2", {"request": request}
    )
Views
Now that we have some basic routing configured, let's build the home page. Here is a nice introduction to Jinja templates if you are unfamiliar.
We will first add two folders under templates, layout will hold our structural markup, pages will be
for the page specific content. This is what it will look like.
└── templates
    ├── layout
    │   ├── base.html.j2
    │   ├── footer.html.j2
    │   └── header.html.j2
    └── pages
        └── home.html.j2
Note: I use the .j2 file extension to avoid prettier from adjusting the template files.
Go ahead and create the following four files.
{# templates/layout/base.html.j2 #}

<!DOCTYPE html>
<html lang="en">
<head>
    <meta charset="utf-8">
    <title>{% block title %}{{ title }}{% endblock title %}</title>
</head>

<body>
{% include "layout/header.html.j2" %}
<main>
    {% block content %}
    {% endblock content %}
</main>
{% include "layout/footer.html.j2" %}
</body>
</html>
{# templates/layout/header.html.j2 #}

<header>
    <h1>Operation HotAPI</h1>
</header>
{# templates/layout/footer.html.j2 #}
<footer>
<p>© 2023 TurtleStack Development</p>
</footer>
{# templates/pages/home.html.j2 #}

{% extends "layout/base.html.j2" %}

{% block title %}
    Home Page
{% endblock title %}
{% block content %}
    <h2>This is the home page</h2>
{% endblock content %}
We aren't taking much advantage of Jinja's templating in these files yet. Just creating some basic layout files and simple content for the home page.
Start the server
Now that we have the bare bones setup. Run the following to start the server.
$ poetry run uvicorn hotapi.main:app --reload
Open up http://localhost:8000 in your browser and you should see the following.
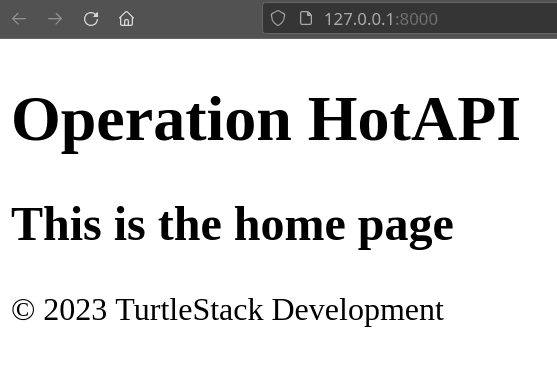
Let's try to top that.
Frontend Setup
Now that we have a working home page, we are going to switch gears to frontend setup.
The frontend configuration is quite a bit more complex,
because that's just the reality of working within the Node ecosystem. Don't worry, it's not as scary as it looks.
I will be using pnpm for the frontend package management.
Any of the popular tools like npm or yarn can be used instead.
You will just need to adjust any pnpm commands in this post to conform to your tool of choice.
First we will need to create a package.json.
$ pnpm init
This generates the package.json file. With some slight adjustments we get the following.
// package.json

{
  "name": "hotapi",
  "version": "0.1.0",
  "description": "A fullstack micro-framework using FastAPI and Hotwire",
  "keywords": [],
  "author": "Shane Scanlon",
  "license": "MIT",
  "type": "module",
  "scripts": {
    "test": "echo \"Error: no test specified\" && exit 1"
  },
  "packageManager": "pnpm@8.12.0"
}
The key difference is that I remove the default main property and replace that with "type": "module".
This is because we are only interested in using browser based ESM modules for this project.
Adding Tailwind
We will be using Tailwind for our CSS styling, so let's add it as a development dependency. Then generate the configuration file.
# add tailwind
$ pnpm add -D tailwindcss @tailwindcss/forms
# generate config file
$ pnpm dlx tailwindcss init
Open up the generated tailwind.config.js file and update the content property.
// tailwind.config.js file

/** @type {import('tailwindcss').Config} */
export default {
    content: [
        './templates/**/*.{html,j2}',
        './frontend/src/**/*.{js,ts}'
    ],
  theme: {
    extend: {},
  },
  plugins: [
    require('@tailwindcss/forms'),
  ],
}
Two path globs are added to the content array. The templates paths make sure the Jinja templates are scanned for tailwind classes. Then we add a glob to look in our js and ts files in the not yet created frontend folder.
Let's go ahead and create the frontend/src directory and add a file named global.css with the following content.
/* frontend/src/global.css */

@tailwind base;
@tailwind components;
@tailwind utilities;
Next let's add the Tailwind build process as a dev script in package.json.
// package.json
...
"script": {
  ...
  "dev": "npx tailwindcss -i ./frontend/src/global.css -o ./static/dist/global.css --watch"
}
...
We will adjust this script in a bit, but it's enough to get us started.
This watches for changes in any of the files from the content globs and when it detects a change,
it generates a stylesheet in static/dist/global.css
Open a new terminal and run the dev command to start watching files. You should see the global.css file generated.
$ pnpm run dev
A couple notes on the build location. First, you should add static/dist to your .gitignore file.
Second, when building for production, the frontend code should be built first,
so that it is already there when the backend gets built.
Now go back to templates/layout/base.html.j2 and let's add some styling.
We will add a link to the global.css and add a few Tailwind classes to check everything is working as expected.
{# templates/layout/base.html.j2 #}

<!DOCTYPE html>
<html lang="en">
<head>
    <meta charset="utf-8">
    <title>{% block title %}{{ title }}{% endblock title %}</title>
    {# add the global stylesheet #}
    <link href="{{ url_for('static', path='/dist/global.css') }}" rel="stylesheet">
</head>

{# add padding to the body #}
<body class="p-8">
{% include "layout/header.html.j2" %}
{# add styles to the main content #}
<main class="text-3xl font-bold text-indigo-700 my-16">
    {% block content %}
    {% endblock content %}
</main>
{% include "layout/footer.html.j2" %}
</body>
</html>
Go back to the browser and refresh the page, you should see the following.
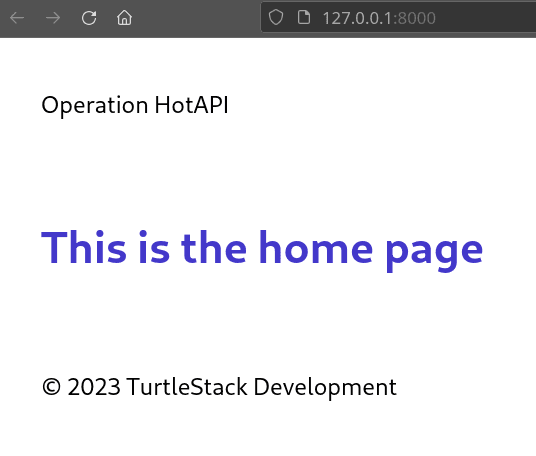
Great! We can see that the Tailwind pre-flight css is in effect and the classes we've added are being read correctly.
Adding Hotwire and TypeScript
When dealing with TypeScript, one of the first questions that need to be answered is which build tool to use. I'm generally a fan of tsup, I did manage to get this working with tsup, but due to Tailwind looking outside of the entrypoint, I had to resort to some ugly workarounds to sync up dev builds. So, I decided to go with Rollup. There is a tradeoff in build speed, but since I would not use this setup for a large-scale project, I made that tradeoff in favor of cleaner configuration.
There are a bunch of Node.js development dependencies needed for this next part. The TypeScript package is needed as well as the helpers functions from tslib. We will use PostCSS to build tailwind and add in autoprefixer for good measure. Next comes the bundler, Rollup, and the plugins needed to make it work with the rest of our setup.
So let's add these as dev dependencies in addition to Rollup. There are also some Rollup plugins needed to tie everything together.
$ pnpm add -D typescript \
    tslib \
    postcss \
    autoprefixer \
    rollup \
    @rollup/plugin-typescript \
    @rollup/plugin-node-resolve \
    rollup-plugin-postcss \
    @rollup/plugin-terser
For scripting, let's add Stimulus as a production dependency. We'll just use a CDN for Turbo.
$ pnpm add @hotwired/stimulus
Now we really get into the delightful potpourris that is Node configuration files. Let's begin with the TypeScript configuration. At the root of the project, create the following tsconfig.json.
// tsconfig.json

{
  "compilerOptions": {
    "composite": false,
    "esModuleInterop": true,
    "forceConsistentCasingInFileNames": true,
    "noEmit": true,
    "inlineSources": false,
    "isolatedModules": true,
    "moduleResolution": "node",
    "noUnusedLocals": false,
    "noUnusedParameters": false,
    "preserveWatchOutput": true,
    "skipLibCheck": true,
    "strict": true,
    "strictNullChecks": true,
    "allowJs": true,
    "declaration": false,
    "declarationMap": false,
    "lib": ["dom", "dom.iterable", "esnext"],
    "resolveJsonModule": true,
    "module": "ESNext",
    "target": "ES6",
    "rootDir": "frontend/src",
    "outDir": "./static/dist"
  },
  "exclude": [
    "node_modules"
  ]
}
Next up, we configure PostCSS for Tailwind. Create the following postcss.config.cjs file at the project root.
module.exports = {
  plugins: {
    tailwindcss: {},
    autoprefixer: {},
  }
}
We configure the Rollup bundler next. Create the following rollup.config.js file.
import typescript from '@rollup/plugin-typescript'
import postcss from "rollup-plugin-postcss";
import resolve from '@rollup/plugin-node-resolve'
import terser from '@rollup/plugin-terser'

export default {
    // use index.ts as the entrypoint
    input: 'frontend/src/index.ts',
    output: [
        {
            // configure output to go to the static folder
            file: 'static/dist/index.js',
            format: 'esm',
            sourcemap: true,
        },
    ],
    plugins: [
        // run PostCSS to generate Tailwind classes
        postcss({
            config: {
                path: "./postcss.config.cjs",
            },
            extensions: [".css"],
            minimize: true,
            // output the css file in /static/dist/global.css
            extract: 'global.css'
        }),
        resolve(),
        typescript({ tsconfig: './tsconfig.json' }),
        terser(),
    ]
};
We will initialize Stimulus in a new TypeScript file. Create the file frontend/src/index.ts and add the following.
// import the css file so rollup is aware of it
import './global.css'
// Import stimulus Application object
import { Application } from '@hotwired/stimulus'

// update the global window type. This is needed for the window.stimulus line below.
// otherwise, the transpiler complains
declare global {
    interface Window {
        Stimulus: Application
    }
}

window.Stimulus = Application.start()
const Stimulus = window.Stimulus

// is this thing on?
const message: string = "Hello, world!"
console.log(message)
Only a couple things remain. We need to update the Node dev script to run the Rollup build. We'll add a production build command as well.
...
"script": {
  ...
  // add a build command
  "build": "rollup -c",
  // replace the old dev command
  "dev": "rollup -c --watch"
}
Finally, we add the Turbo CDN script and index.js to the base template.
{# templates/layout/base.html.j2 #}

<!DOCTYPE html>
<html lang="en">
<head>
    ...
    {# add the Trubo CDN #}
    <script type="module">
        import hotwiredTurbo, {
            connectStreamSource,
            // we specify 7.3.0 explicitly
            // at the time of this writing the default is version 8-beta which throws errors
        } from 'https://cdn.skypack.dev/@hotwired/turbo@7.3.0'
    </script>
    {# add the bundled index script #}
    <script src="{{ url_for('static', path='/dist/index.js') }}"></script>
</head>
Let's see if this works. Kill the existing pnpm dev process and run it again.
If all goes well static/dist/index.js should be created.
Refresh the browser and check the console for the hello world log.
Putting it all together
After all that setup, we have some purple text and a console log! 🎉
Using Turbo
Let's start integrating Hotwire. We'll make a simple todo app.
Delete the class attribute from the main node in base.html.j2
and replace the contents of templates/pages/home.html.j2 with the following.
{# templates/pages/home.html.j2 #}

{% extends "layout/base.html.j2" %}

{% block title %}
    Home Page
{% endblock title %}
{% block content %}
<div class="max-w-3xl my-8">
    <h2 class="bg-indigo-500 text-white font-bold p-2 text-2xl">
        Hotwire ToDo Demo
    </h2>
    <div class="p-2 border">
        <turbo-frame id="todos" src="/todos">
            <p>Loading...</p>
        </turbo-frame>
    </div>
    <form
        action="/todos"
        method="POST"
        class="mt-4 flex rounded-md shadow-sm items-center" >
        <div class="grow focus-within:z-10">
            <input
                type="text"
                id="todo"
                class="
                    block w-full rounded-none rounded-l-md border-0
                    py-1.5 pl-3 text-gray-900 ring-1 ring-inset
                    ring-gray-300 placeholder:text-gray-400 focus:ring-2
                    focus:ring-inset focus:ring-indigo-600
                    sm:text-sm sm:leading-6"
                placeholder="ToDo">
        </div>
        <button
            type="submit"
            class="
                relative -ml-px inline-flex items-center gap-x-1.5
                 rounded-r-md px-3 py-2 text-sm font-semibold
                 text-white ring-1 ring-inset ring-gray-300 bg-indigo-500">
            <svg
                viewBox="0 0 24 24"
                stroke-width="1.5"
                stroke="currentColor"
                class="w-6 h-6">
                <path
                    stroke-linecap="round"
                    stroke-linejoin="round"
                    d="M12 4.5v15m7.5-7.5h-15" />
            </svg>
        </button>
    </form>
</div>
{% endblock content %}
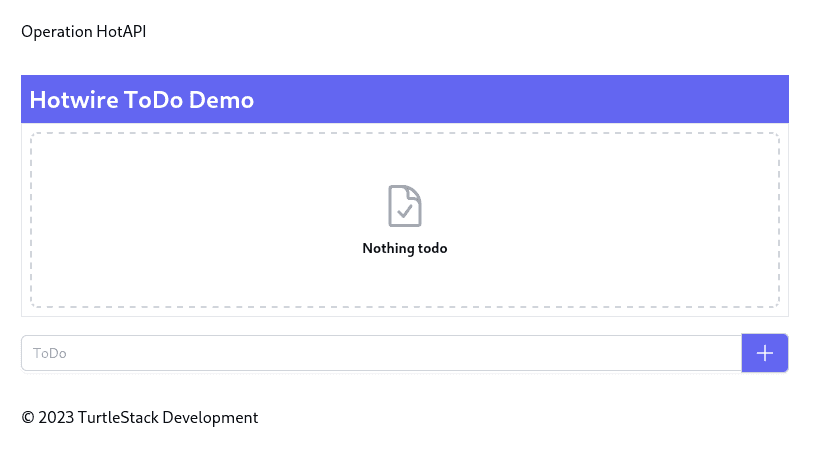
That should give you something like the following.
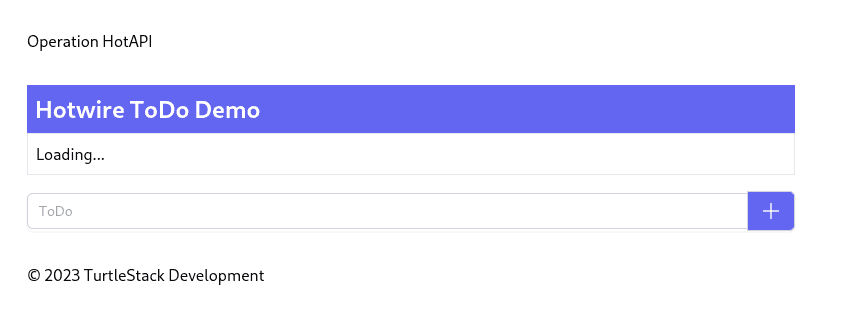
The interesting thing to note from the HTML above is this bit.
<turbo-frame id="todos" src="/todos">
    <p>Loading...</p>
</turbo-frame>
This turbo-frame node sets up one of the pockets of interactivity mentioned at the beginning of this article.
We fill it with some placeholder loading text to start. Now, let's head back to pages.py and add a route for this.
# backend/src/hotapi/routers/pages.py
...

# in-memory todo state
_todos = []


@router.get("/todos", response_class=HTMLResponse)
async def get_todos(request: Request):
    return _templates.TemplateResponse(
        "frames/todos.html.j2", {"request": request, "todos": _todos}
    )
We create an empty _todo list to hold the todo items we are going to create.
Then we add a new /todos route.
Notice this is the same route as provided to the src attribute of the turbo-frame node.
When a Turbo frame has a src attitude, it will automatically load the content from that endpoint into the frame.
In a real application, you may want to include this in the initial payload.
I'm taking this approach here, mostly for demonstration purposes.
Let's go ahead and add the frame template. Create a new frames folder inside the templates folder.
In there create the following todos.html.j2 file.
{# templates/frames/todos.html.j2 #}

<turbo-frame id="todos">
    <ul class="grid grid-cols-1 space-y-2" id="todo-items">
        {% for todo in todos %}
            {% include "frames/todo.html.j2" %}
        {% endfor %}
    </ul>
    {% if todos | length == 0 %}
        <div
            id="nothing-todo"
            class="
                relative block w-full rounded-lg border-2
                border-dashed border-gray-300 p-12 text-center
                 hover:border-gray-400 focus:outline-none
                 focus:ring-2 focus:ring-rose-500
                 focus:ring-offset-2"
        >
            <svg
                fill="none"
                viewBox="0 0 24 24"
                stroke-width="1.5"
                stroke="currentColor"
                class="mx-auto h-12 w-12 text-gray-400"
            >
                <path
                    stroke-linecap="round"
                    stroke-linejoin="round"
                    d="M10.125 2.25h-4.5c-.621 0-1.125.504-1.125 1.125v17.25c0 .621.504 1.125 1.125 1.125h12.75c.621 0 1.125-.504 1.125-1.125v-9M10.125 2.25h.375a9 9 0 019 9v.375M10.125 2.25A3.375 3.375 0 0113.5 5.625v1.5c0 .621.504 1.125 1.125 1.125h1.5a3.375 3.375 0 013.375 3.375M9 15l2.25 2.25L15 12" />
            </svg>
            <span
                class="
                    mt-2 block text-sm
                    font-semibold text-gray-900">
                    Nothing todo
            </span>
        </div>
    {% endif %}
</turbo-frame>
Here we check if there are any todo items. If there are we render each one of them in their own Turbo frame. If not, we show a message saying there is nothing to do.
We need to also create the individual todo component as well.
{# templates/frames/todo.html.j2 #}

<turbo-frame id="message_{{ todo.id }}">
    <li class="p-2 even:bg-gray-50 odd:bg-white">
        <div class="flex space-x-2 items-center">
            <span class="grow">{{  todo.text  }}</span>
            <form action="/todos/{{ todo.id }}" method="PUT">
                <input
                    type="hidden"
                    id="todo_id"
                    name="id" value="{{ todo.id }}" />
                <input
                    type="hidden"
                    id="todo_text"
                    name="text" value="{{ todo.text }}" />
                <input
                    type="hidden"
                    id="todo_is_done"
                    name="is_done" value="True" />
                <button
                    type="submit"
                    class="bg-gray-200 text-green-700 p-2"
                >
                    <svg
                        fill="none"
                        viewBox="0 0 24 24"
                        stroke-width="1.5"
                        stroke="currentColor"
                        class="w-6 h-6"
                    >
                        <path
                            stroke-linecap="round"
                            stroke-linejoin="round"
                            d="M4.5 12.75l6 6 9-13.5"
                        />
                    </svg>
                </button>
            </form>
        </div>
    </li>
</turbo-frame>
Here we add another Turbo frame which displays the text and add a button to mark the item done. We will come back to this in a bit. If you refresh your browser, the loading text should be replaced with no messages block.
Next, we will add some simple CRUD features. Open up models.py and add the following.
# backend/src/hotapi/models/models.py

import inspect
from typing import Optional, Annotated
from fastapi import Form
from pydantic import BaseModel


# since Hotwire deals mostly with form data instead of json,
# we will add this decorator function to convert Pydantic models
# taken from:
# https://stackoverflow.com/questions/60127234/how-to-use-a-pydantic-model-with-form-data-in-fastapi/77113651#77113651
# the accepted answer no longer works with FastAPI 0.103.1
def as_form(cls):
    new_params = [
        inspect.Parameter(
            field_name,
            inspect.Parameter.POSITIONAL_ONLY,
            default=model_field.default,
            annotation=Annotated[model_field.annotation, *model_field.metadata, Form()],
        )
        for field_name, model_field in cls.model_fields.items()
    ]

    cls.__signature__ = cls.__signature__.replace(parameters=new_params)

    return cls

# add the decorator to our class
@as_form
class ToDo(BaseModel):
    id: Optional[int] = None
    text: str
    is_done: Optional[bool] = False
Since Hotwire does not deal with a lot of json, we start by adding a class decorator, as_form,
to make adding Pydantic models to request signatures a little easier.
It's not really needed for such a simple use case,
but if you want to build something more robust, you'll want something like it.
Then we add that decorator to a ToDo model, which has id, text, and is_done properties.
Back in our pages.py router, lets add the create endpoint.
# backend/src/hotapi/routers/pages.py


@router.post("/todos", response_class=HTMLResponse)
async def add_todo(request: Request, todo: ToDo = Depends()):
    # Assign an ID
    todo.id = len(_todos) + 1
    # update the todo list
    _todos.append(todo)
    # render the html
    return _templates.TemplateResponse(
        # we will create a new stream folder for this template
        "streams/add_todo.html.j2", {"request": request, "todo": todo},
        # Hotwire looks for this header to know a DOM update is needed from a form submission
        headers={"Content-Type": "text/vnd.turbo-stream.html; charset=utf-8"}
    )
This is a straight-forward put request to update the state and render some HTML to inject back into the page. Take note of the header added to the response. This is needed for Turbo streams to work properly. Streams are how Turbo makes targeted DOM updates from WebSockets, Server Side Events, or as a response to form submissions. We will only go over how to implement streams for a form in this post.
Create a the streams folder within the templates folder. Next create the file, add_todo.html.j2.
{# templates/streams/add_todo.html.j2 #}

<turbo-stream action="remove" target="nothing-todo"></turbo-stream>
<turbo-stream action="append" target="todo-items">
    <template>
        {% include "frames/todo.html.j2" %}
    </template>
</turbo-stream>
Each Turbo stream has an action and a target attribute. The action tells Turbo what to do when it sees this stream.
The target is the id of the DOM element on which to apply that action. This template contains two streams.
The first stream will remove the empty state div. Since we are adding a todo item, it will no longer be needed.
The second stream actually adds the new todo item to the DOM.
The attribute target="todo-items" tells Turbo that we want to update the DOM element with the id todo-items.
If you look back in todos.html.j2 you will see this is the <ul> tag.
The attribute action="append" tells Turbo to take the HTML response and add it to the end of the target DOM element.
All Turbo streams requires the HTML response to be wrapped in a <template> tag with the exception of remove actions.
Now refresh the browser and add a todo item. You should see it added to the screen.
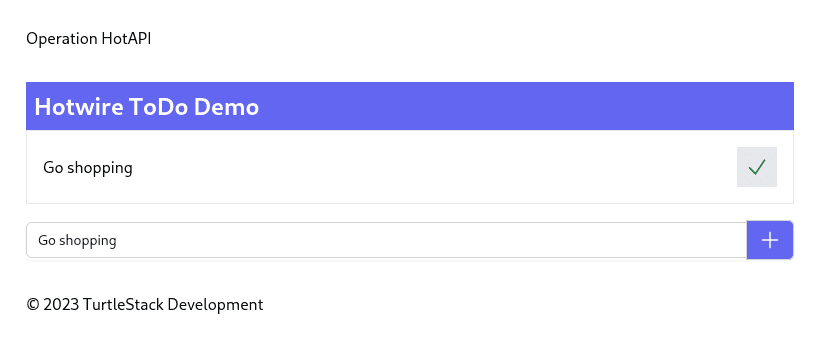
You may notice that the input text has not been cleared out after adding the item. We will address that in a moment.
First lets add the endpoint to complete a todo item. The frontend is already configured for this.
We just need to handle the request. Add the following endpoint to the pages.py router.
# backend/src/hotapi/routers/pages.py
...

@router.put("/todos/{todo_id}", response_class=HTMLResponse)
async def update_todo(request: Request, todo: ToDo = Depends()):
    global _todos
    _todos = [todo if item.id == todo.id else item for item in _todos]
    return _templates.TemplateResponse(
        "frames/todo.html.j2", {"request": request, "todo": todo}
    )
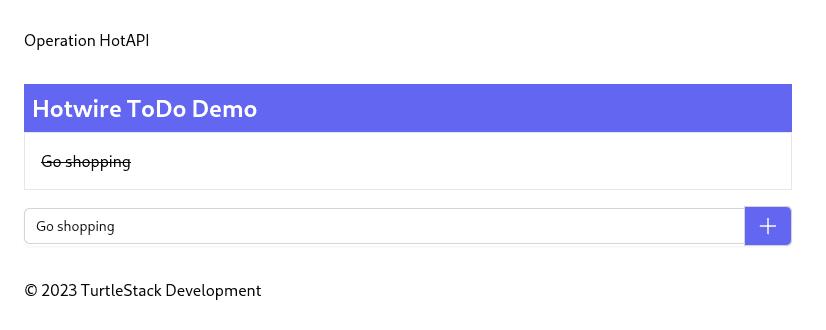
This replaces the existing todo with the one submitted, then renders the template we added earlier. Click the complete button and the item should be updated.
Sprinkling in Stimulus
So, we have a working todo app which does strategic DOM updates without writing any JavaScript, but we still have that input value hanging around. Let's add a Stimulus controller to clean that up.
Back in frontend/src create a new folder named controllers and create the file add-todo-controller.ts.
// frontend/src/controllers/add-todo-controller.ts

import { Controller } from '@hotwired/stimulus'

export default class extends Controller<HTMLFormElement> {
    reset() {
        this.element.reset()
    }
}
We extend Stimulus the Controller class and add a form reset function.
Back in index.ts we need to register this controller.
frontend/src/index.ts

...

import AddTODOController from './controllers/add-todo-controller'
Stimulus.register('add_todo', AddTODOController)
Then in home.html.j2 add these two attributes to the following data-controller and data-action attributes to the form.
{# templates/pages/home.html.j2 #}

<form data-controller="add_todo"
      data-action="turbo:submit-end->add_todo#reset"
      action="/todos"... >
The data-controller attribute tells Stimulus that this is a AddTODOController.
The data-action tells Stimulus to run the reset function when the Turbo submit-end event is dispatched.
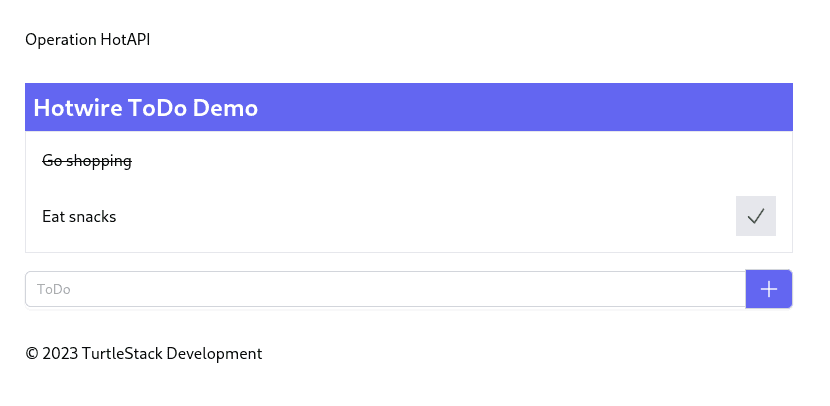
Add another todo item, and the input should now reset itself.
Wrapping up
Even though this was a long article, we only just scratched the surface of what Hotwire is capable of. If you are interested in learning more read the docs for the Hotwire packages. Hotwire tends to fly under the radar despite how powerful it is. I attribute that to it being spawned from the Ruby on Rails world. And, while that is still a solid framework, it's popularity has waned, and exciting developments go unnoticed. As a result information and tutorials are a bit sparse. I hope this post helps somewhat.